Latest Generation VisionGauge® System Delivers as the New Standard for Turbine Disk Inspection & Measurement
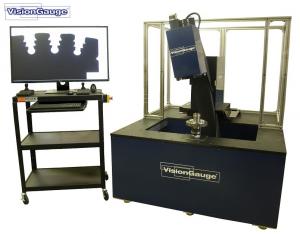
The VisionGauge® Disk Inspection & Measurement System inspects turbine disks and verifies all slots and features meet requirements and are within tolerance.
With unique and innovative patented technology, such as CAD Auto-Pass/Fail™ and CAD Auto-Align™ tools, the system produces very high accuracy results 100% automatically without operator subjectivity or dependence. The system is fast and carries out a complete inspection of every slot on every disk. Runtime depends on the specific part (for example: number of slots) and requirements but is generally in the order of just a few minutes for the fully-automated inspection of an entire disk.
The latest generation VisionGauge® Disk Inspection & Measurement System now offers new and enhanced capabilities to meet all of the manufacturing requirements for turbine disk inspection and measurement. Some of the capabilities of the latest-generation VisionGauge® Disk Inspection & Measurement System include:
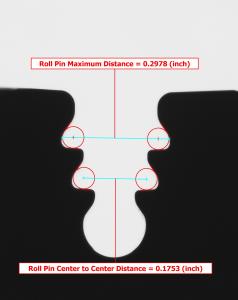
• Completely automated fir tree and dovetail slot profile inspection
• Fully automated knife edge setup
• Slot spacing inspection
• Centerline inspection
• Radial length/Z plane distance inspection
• Cone & helix angles are supported
• Pressure face flatness/slot perpendicularity inspection and verification
The VisionGauge® Disk Inspection & Measurement System includes 5 axes of motion (X, Y, Z, Rotary, Tilt) to view slots properly at all angles, position the disk from slot to slot, etc. The systems are fast, accurate, easy-to-use, and simple to program. The software is intuitive and the operator interface is straightforward, allowing you to directly use your CAD data to build the inspection program and setup tolerances. These robust systems are even designed for use on the shopfloor.
VisionGauge® Disk Inspection & Measurement Systems also provide complete data capture, reporting, and analysis, including:
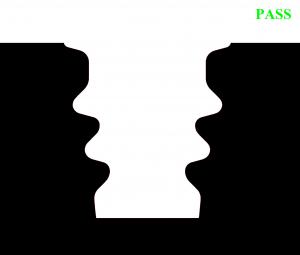
• VisionGauge®'s CAD Auto Pass/Fail™ Analysis mode permits operators to easily review non-conforming profiles by snapping directly onto failed edges, providing full details when encountering any out-of-spec regions.
• Data review for each slot is as easy as double-clicking on its report entry in the Data Group to revisit a slot’s specific location and inspection conditions.
The VisionGauge® Disk Inspection & Measurement System is the new standard for inspecting turbine disks and verifying that all their features are within tolerance. It allows turbine disks manufacturers to automatically inspect 100% of the slots on every disk and ensure that the dimensional accuracy of their products meets today’s ever-tighter tolerances while also reducing inspection time and overall inspection cost. It eliminates operator-to-operator variation altogether and enables manufacturers to collect accurate numerical values of all dimensions automatically, to compute process statistics and create complete inspection & measurement reports, making it a highly valuable tool for process control and improvement. The VisionGauge® Disk Inspection & Measurement System allows turbine disk manufacturers to gain a real advantage in today's competitive market.
To learn more about the benefits of the VisionGauge® Disk Inspection & Measurement System, please contact VISIONx, Inc., either by visiting www.visionxinc.com or by emailing info@visionxinc.com.
VISIONx INC. specializes in automated imaging, visual inspection and high accuracy measurement solutions sold worldwide and is the manufacturer of the VisionGauge® Digital Optical Comparator.
VISIONx INC.
210 Brunswick
Pointe-Claire (Quebec)
Canada H9R 1A6
Web: www.visionxinc.com
Email: info@visionxinc.com
tel: (514) 694-9290
fax: (514) 694-9488
Patrick Beauchemin
VISIONx, Inc.
+1 514-694-9290
info@visionxinc.com
Visit us on social media:
Facebook
Twitter
LinkedIn
YouTube
Legal Disclaimer:
EIN Presswire provides this news content "as is" without warranty of any kind. We do not accept any responsibility or liability for the accuracy, content, images, videos, licenses, completeness, legality, or reliability of the information contained in this article. If you have any complaints or copyright issues related to this article, kindly contact the author above.


